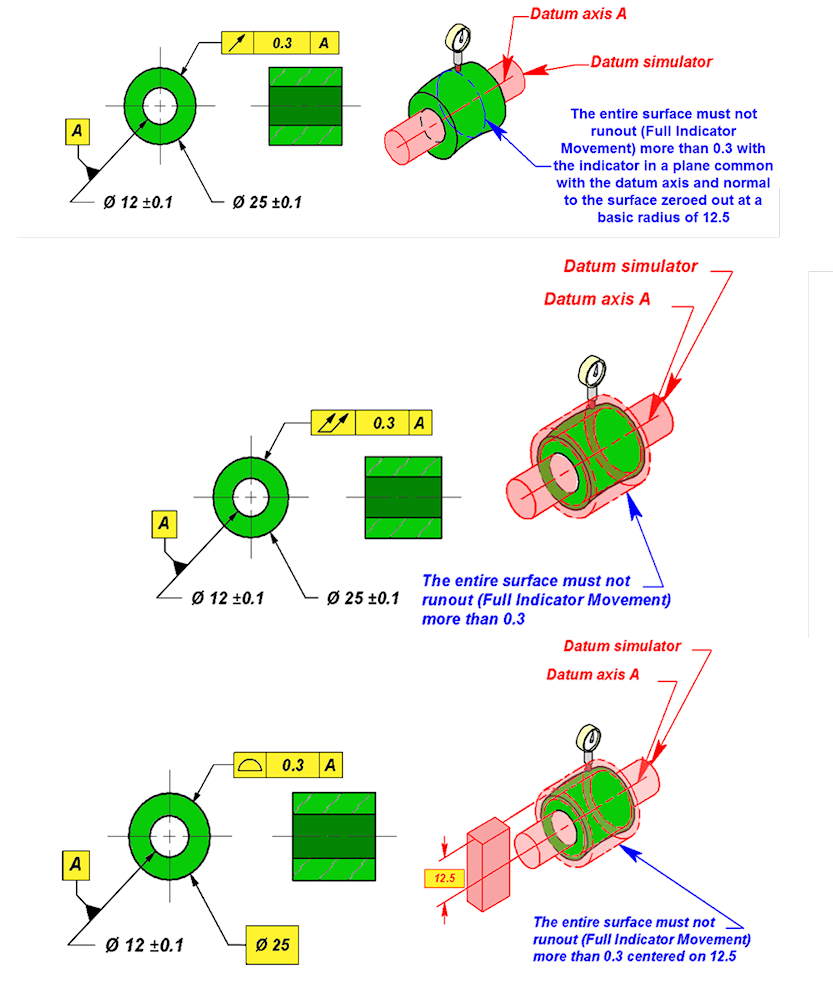
As pointed out in last month’s Tip, a lot of confusion exists over the meaning of the geometric tolerances shown in the chart. Tip #9 illustrated possible inspection methods for position at MMC and RFS and concentricity. This month’s Tip continues with sample inspection methods for circular and total runout and profile.
Circular runout requires inspecting circular elements individually. Because of this, circular runout will not detect changes in size. Any barreling, waisting or taper should be ignored. These conditions will be controlled by the size tolerance.
Total runout requires determining the full indicator movement over the entire feature. Total runout, therefore, detects any changes in size, i.e. barreling, waisting or taper. Although changes in size are controlled, the actual size of the feature is determined and controlled by the size dimension and tolerance. A feature may be manufactured to a very tight size tolerance but due to eccentricity, the runout could be large. Total runout controls location, orientation, and form (if the runout tolerance is tighter than size tolerance) but not size.


