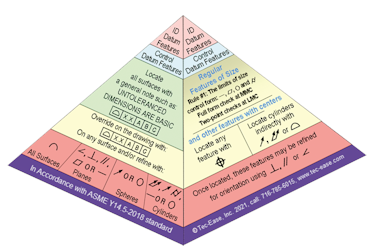
Profile is one of the most useful geometric tolerances available. There are two types of profile tolerance — profile of a line and profile of a surface. The profile tolerances are the only geometric tolerances that may or may not have datum feature references. Without a datum feature reference in the feature control frame, the profile tolerance is controlling form, or size and form if the size dimension is basic. Without a datum feature reference, profile of a line is very similar to the control seen with straightness or circularity and profile of a surface is similar to a flatness or cylindricity tolerance. Care should be exercised in using profile without a datum feature reference. It usually makes the inspection of the part more difficult.
With a datum feature reference, the profile tolerance may control all four major characteristics of size, form, orientation and location. When a profile tolerance is used on the drawing, the tolerance is implied centered on the surface of the feature that has been defined by basic dimensions.

